home about us email printables
Showing posts with label Sewing. Show all posts

May 3, 2011

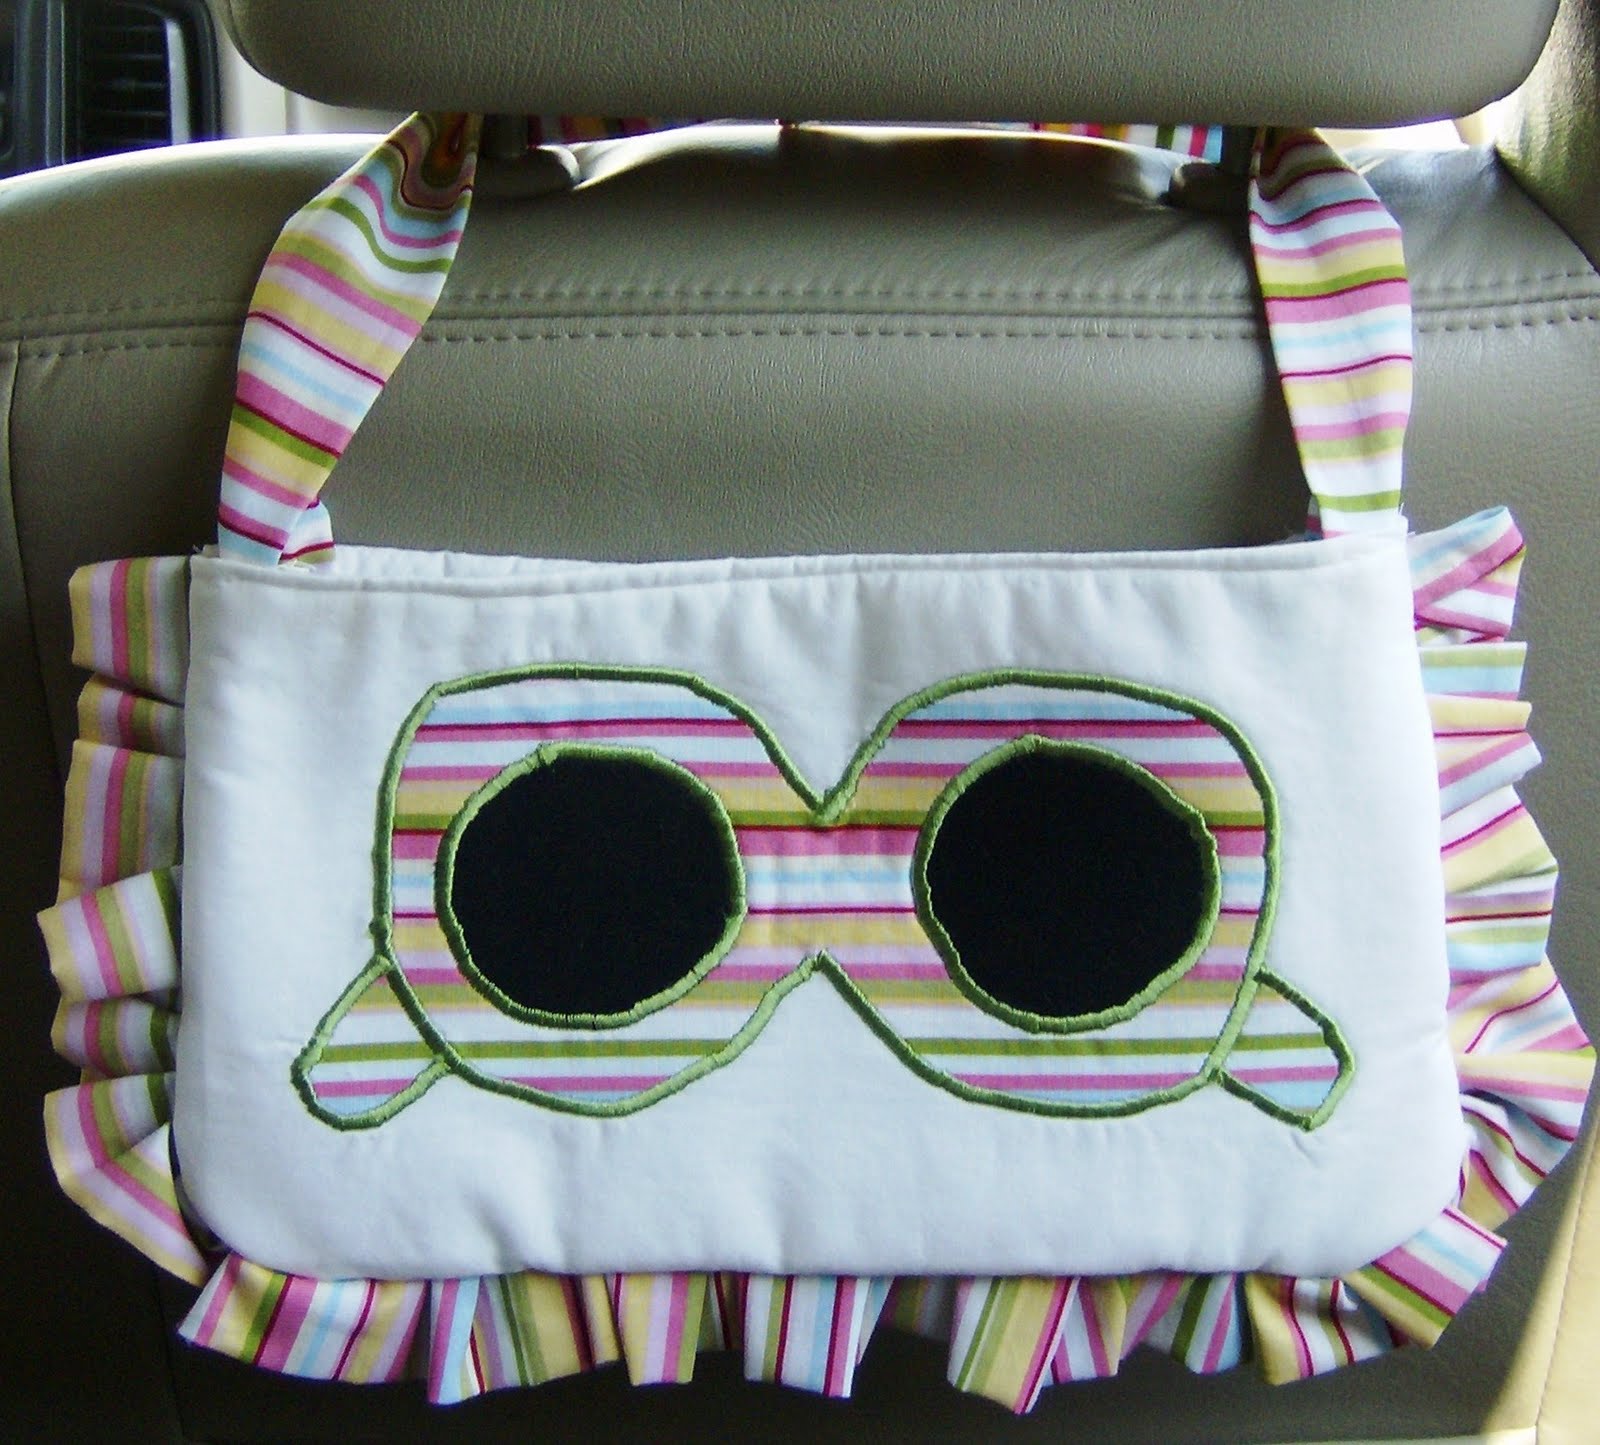
Car Organization:Sunglass Holder


        Hello ladies, this weekend I got a few hours to myself...what did I choose to do with it you might ask? Sew of course! I totally should have been doing laundry or cleaning, but really, that's not nearly as fun! So, I whipped up a car sunglass holder to help keep us more organized. Our kids LOVE sunglasses!  We really did need something to stash our specs in. We use to keep all their little sunglasses stowed away in my car console, I always hated passing the glasses back to them while I should be driving. This helps so much,  they love being able to get them when they need them and feel more independent. Plus, they think its cool to sit in front of this, so I just  had to make something to put on the other seat. Anyway, here's the skinny on how I made it...

Materials
(4) 12 1/2 " x 8" of material for the bag
(2) 12 1/2" x 8" of fusible fleece to help give the bag some padding
(2) 12" x 5" of material for the straps
a few scraps of double stick fusible webbing for the sunglass and lens applique
Ruffle-mine was 3" wide. Then for the length, you want to measure the 3 sides of the bag and double it. (I only had a little material to work with so I had to do my ruffle in 3 sections) normally you just double the total length of  all the sides.
2 small pieces of sewable velcro
thread
sunglass applique pattern, you can download here
(1/4 seam allowance used throughout)


                               First print off the sunglass applique (see the free printable download above) Print it on cardstock, cut out the sunglasses and lenes.
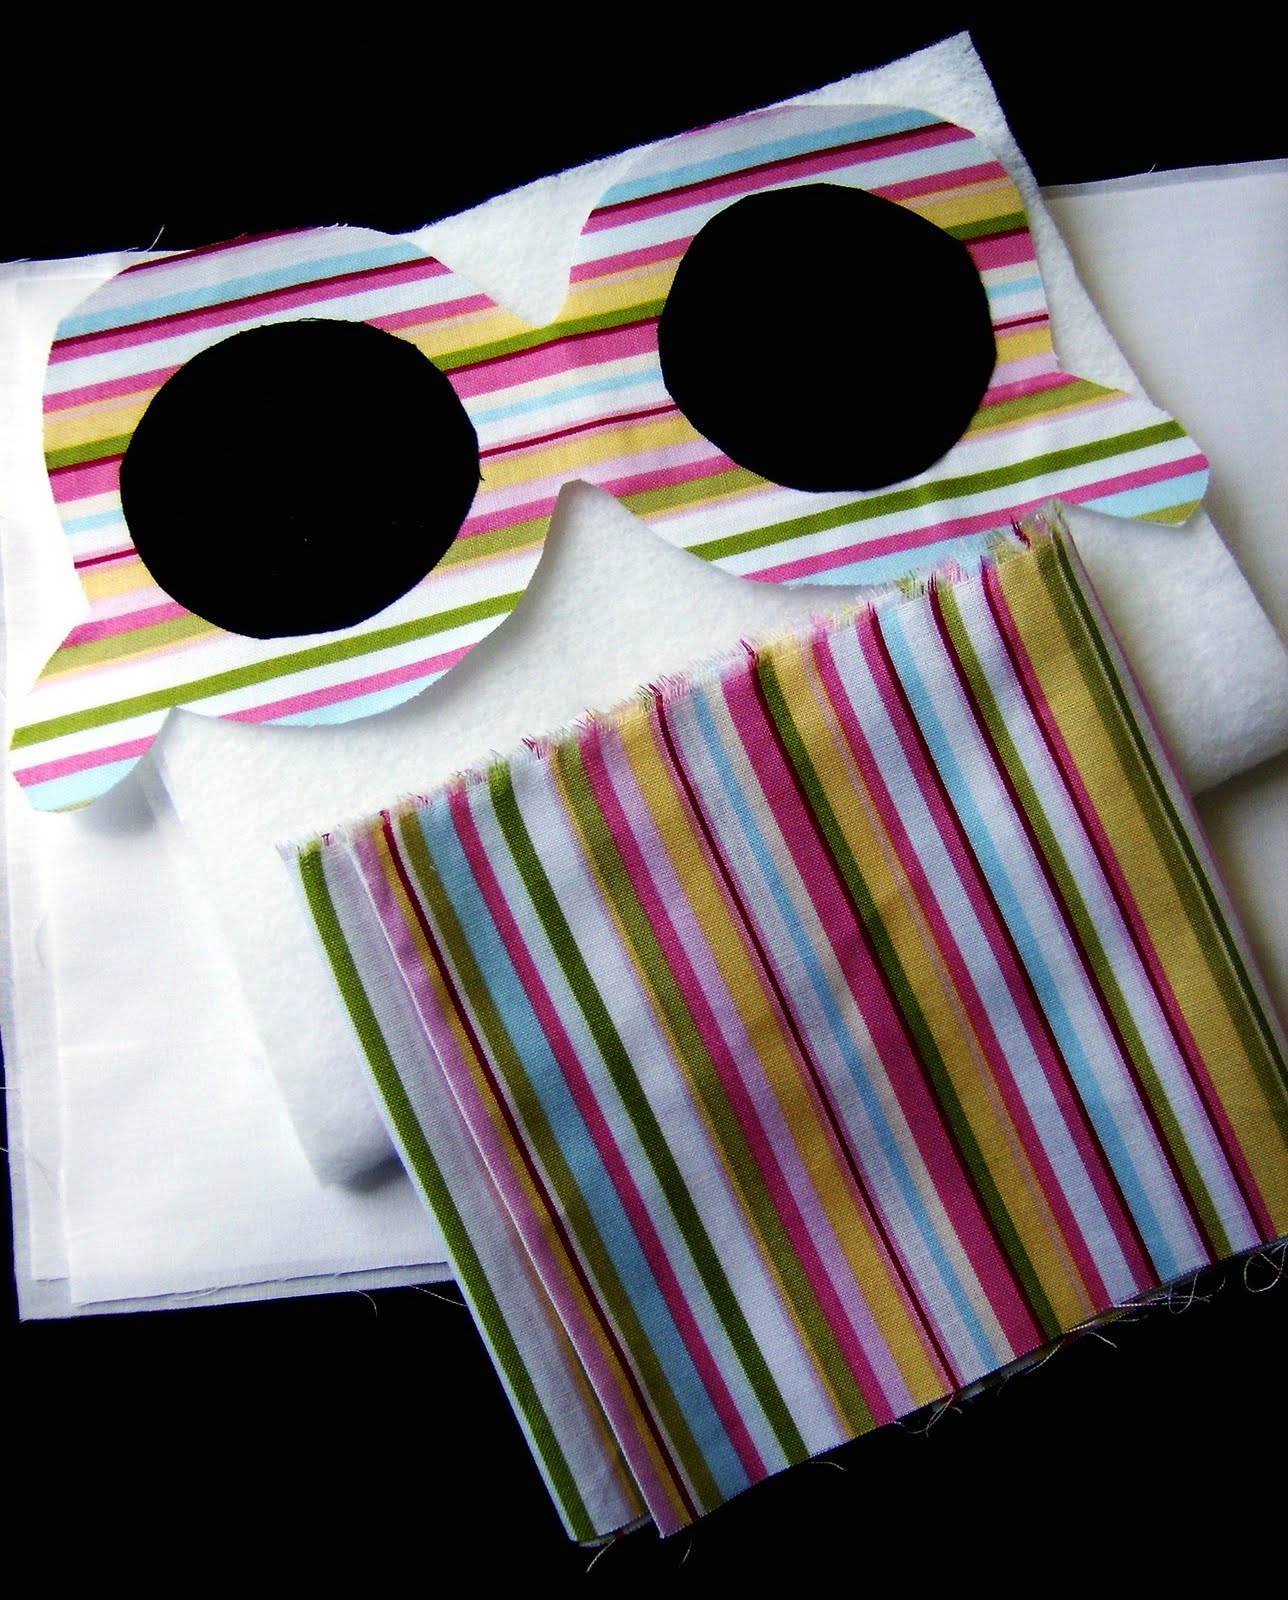

Then, attach the fusible web on the wrong side of the fabric you will be using for your glasses. Trace the sunglasses out on it. Cut it out. Do the exact same thing for the lenes. Peel off the super thin film on the webbing and iron the lenses to the glasses. Then remove the thin backing on the glasses and iron the glasses on your main fabric

Next iron on a piece of your fusible fleece to the back of the your main fabric. This will help give it some padding. It will also act as a stabilize when you sew around the applique.

Sew around the lenses with a zig zag stitch then move on to the glasses. I used a really tight zig zag stitch.  Now, you will want to take the applique you just finished, flip it over and iron on the back peice of fabric to the webbing.

Grab your two remaining pieces of main fabric and sandwich the webbing between them and iron them together.


Now on to the ruffle. You will want to fold your material in half, right side facing out. Then go here and check out this tutorial on how to complete the ruffle. They show you how to make one by hand (which is what I did) or using the machine.

Once you've completed your ruffle, pin it to your fabric with the clean folded ends towards the sunglass applique. Then lay the backing on top and sew up the 3 sides of the fabric.

  Remove the pins and flip it inside out. Whalaaa, almost done... Now,take the opening of the bag and fold the seam down a bit and sew the raw edges of the bag closed.
                                                             Now onto the straps...
The last step....Take your straps, fold them in half wrong sides facing each other. Sew up all the way along the edges. Flip your material back over to the right side.

Next, tuck just a little of the raw edges of the end of the strap inside, and place the velcro on top. Sew the velcro on. This will also sew the raw edges closed. Do the same thing on the other strap. Keep in mind the placing of the velcro and how they two pieces will meet. For example: One of the peices of velcro should be attached on the front side and the other on the back side (seam side) of the material as the above picture.

Then take the other end of the strap, fold raw edges inside a bit and sew them to the sides of the bag. I choose to hand sew them so my footer would not accidentally sew over the ruffle.


 Whoot Whoot all done! Now time to add the sunglasses for safe keeping.

Thanks for Visiting!
I hope all you ladies have a very Happy Mothers Day this weekend!!


I am linked up here:


April 1, 2011

Tote Bag

         Don't you just love it when you are right in the thick of a project and realize, this project is really going to stretch ya. That was this tote for me. Its always so nice to learn new things! The pattern, actually it was more like a list of instructions, was great in the fact that it gave you tons of measurements for different sized bags. Somehow though, I got myself all turned around with mixing the measurements. Oops, hate when that happens. Thank goodness my sweet hubby came in and helped me work through all the instructions. But, after everything was said and done, I love it. I am so in love right now with black, white and pink.
          Now that this is done, I realized that this would make one fun baby shower gift, filled to the brim with diapers and baby goodness. It has some pretty fun pockets on the inside that would come in handy for all those binkies and bottles. I am using mine though for a church bag. I made the largest size on the pattern, so if my 2 year old gets unruly in church, I could put him in the tote and carry him right out, I kid, but yes it really is that big. It really will be perfect for all our Sunday gear. I got the pattern from a local store some time ago, but I noticed on the pattern they also have an online store here.


    I would love to see all the fabulous projects you created
                                       that made you stretch yourself a bit and learn something new!          
      Thanks for visiting!
                                                                   
Don't forget to sign up as a follower.
I am linked up here:

Plastic Grocery Bag Holder

        Do you always have those plastic grocery bags everywhere? I sure did. Love them, but man they were getting unruly. I was tickled pink to discover I had just enough fabric from a previous project to make a holder to stash them in. Don't you just love it when that happens! This truly was the best nap time project ever. It took maybe 15 minutes to whip this up once the material was cut. It is so nice to now have something to tame those bags and make storing them cute.There are a ton of tutorials out there on these darling numbers, but I found this one over here most helpful, so simple and easy breezy.  Here's the finished project.


Send me your pictures if you sew one up, I would love to see your fabulous creations!
Thanks for visiting!


I am linked up here:

March 22, 2011

Bathing Suit Cover Ups

     I know, I know, its only the first part of spring, I shouldn't be dreaming of summer already, huh? But we just got back from an amazing trip to the beach and I just can't seem to help myself!

      Before we left for our trip it got me thinking... I knew I was going to need something this summer to help free up my hands. Somehow, I always end up carrying everyones towels, goggles, snacks and countless other pool goodies. I either needed to grow more hands or come up with a better system.

    I decided to turn their towels into pool cover ups. I made them so they can put them on all by themselves. Even my two year old. Then, this was sure to free up some of the goodies I always end up carrying for everyone. Plus, this would keep them warm after getting out of the pool. I made a wrap for the girlies, and a towel cape for the boys.

Here's all the stuff your going to need...
A beach towel (if its a larger one you can probably get two wraps out of one towel depending on the age
                        of the girls and size of the towel)  (For the boys cape-I used the entire towel for one cape.)
Fabric to make binding (or you can but it premade)
Thread
Velcro-the kind you can sew


       We will start with the girls wrap. Trim your towel. Use your little ones as a guide. If your kids are younger and you have a large beach towel, you should be able to make two of these from one towel.

       Now that you cut your towel, you have lots of frayed ends that will need some serious binding. You can purchase premade binding at Joanns. I had lots of white fabric and just made mine. Then, you want to sew it on. I totally consider myself a beginner sewer for sure! But, you can also skip this step if you wanted to. You could easily just fold the towel edge over and sew a seam up. But, if you do choose to add the binding, here is a fabulous tutorial here . I made mine a little wider then what was mentioned in her tute because we are working with thick towels and I thought it would look a little better. I am still totally learning, but it was fun to try something new.

        Then use some of the scrap towel from when you trimmed it up, to make the two straps. Again, the best thing here is to use your child as a guide on  the width and length of your straps. Turn the strap inside out and sew down the open edge.


                                              Then attach them to the wrap and sew them on.


The straps look like they pinned on uneven, but one side of the wrap is longer since that wraps around her on the inner part of the wrap.


Next, have your little princess try on her new wrap so you can pin the velcro in place. I placed my velcro on the top part of the wrap. Then sew it on.

Now, you are done and have a fabulous little summer wrap for your little Miss!


Now on to the boys...I knew I needed something for my little fellas, so I had to make a super hero towel cape for them. I got all the sizes and patterns over here at The Long Thread

I decided to fold the towel in half and then cut the pattern out.


                    Now that its cut out, you will want to add the binding we talked about above.

                 Finally, sew on the velcro. Now your little man has a super hero towel cover up for the summer.
Sorry this is not the best picture, its hard to get a two year old to stand still for a photo op!
      Now the kids will have fun with their new threads and you just scored yourself less to carry at the pool since the kids will be wearing their towels! I would love to see any of the cover ups you make! Happy Sewing!

                                                                             Thanks for visiting!


I am linked up here
Dot Dot Dot, Todays Creative Blog, Its Sew For You
Tea Room Home, Sugar and Dots Blue Cricket Designs
Sew Much Ado, Somewhat Simple, Its A Keeper
Fireflies and Jellybeans


March 8, 2011

Fabric Headband

                                      
          Hello bloggy friends! Here is a fun little fabric headband I made for our little miss, its so super easy. It's the perfect project to help use up some small amounts of scraps laying around. You can whip up a bunch of these beauties in no time!

Here's what you will need...
I used two strips of material both measured 4" wide and 16" long
(I would measure your little ones head though to make sure on size. You want the fabric to wrap around her head and go a little past her ears.)
5"of elastic. I use the 1/4" soft stretch.
2 pieces of rick rack measuring 16" long.

                 Cut your material and iron the seams over. (I iron because I am totally lazy and hate to pin)

       Now, I guess I have to let you in on my dirty little secret! I temporailly glue my rick rack down! Every time I use to pin the rick rack it took forever to get it "just so". Then, it always ended up shifting on me when I sewed it down somehow. It wasn't very fun. 

      So, I figured this good 'ol glue stick would do the trick, and it really does work like magic everytime. If you do this apply the glue stick to the rick rack not the material. It helps hold it better. The glue dries pretty quick, but I found that the scotch glue stick seems to give me a few extra minutes of hold time so I can get it sewn up before it dries.  Once you have them temporally glued down, add the other peice of fabric on top of the fabric with the rick rack.


                     Tuck the ends in and pin those. Then sew up the right and left sides of the headband.

\
Finally, slide the elastic in the ends that you tucked in and sew the elastic down.

                                                 Taa Daa, a new headband for you little miss!


This was a fun and quick little project! Happy Sewing.
 Thanks for visiting.


March 3, 2011

Placemat Purse

      I found these darling placemats for $1.00 several months ago. I have wanted to make a purse for my little misses to take to church for her scriptures for sometime now. She has totally fallen in love with purses since her aunt made her a super cute one this winter. Those poor placemats I grabbed have been collecting dust in my fabric basket, so I was so excited today when I had a few extra minutes to make this for her. I didn't realize how quick a project this was, or I would have done this months ago!

Materials I used
2 placemats
Some scrap material for the rosettes
Some bling for the center of the rosettes, or whatever you have handy (buttons, old earings, or jewels)
Glue gun
Felt for the back of the rosettes
Pins to attach the rosettes to the bag


       I loved these placemats because they were fairly thick and were different colors on the reverse side.


I folded one of the placemats in half. Sewed up the left and right side. I didn't worry about my seams because I was going to turn this baby inside out.


                                         Here's what it looked like after I flipped it inside out.

For the strap I cut the other placemat the 6 " wide. I didn't take any off  the length


Fold the material for the strap over and sew down the edge.


This is what the strap looks like when its been flipped inside out and is done.


 Sew the strap to the side seam of the bag. Do that on both sides. I 'attempted' to do this. However, after my needles decided they didn't like the thick fabric as much as I did, they continued to break. I ended up hand sewing the straps on. But, if you don't buy crazy placemats like I did, this part will be a cinch and you won't have to hand sew it!

Then I started working on making the rosettes. There are so many fabulous tutorials out there, you can find out more on how to make them here.

The final product! The little misses loves it, hopefully next time it won't take me months to finish one of her sweet little projects! Even with having to hand sew the strap on, this project was so super easy and quick. Can't wait to see her test it out Sunday!  

Thanks for visiting!

I am linked up here:

February 17, 2011

Lets Talk Trash...

          Even though I stay at home with our kids, there are days I feel like I actually live in my car. I'm sure you've had a few of those days also :) Needless to say, my car has seen its fair share of wrappers, crumbs, and endless amounts of junk! So, I  found a little inspiration here. I took matters into my own hands and figured I could take a stab at making a little 'ol bag, to try and solve our cars trashy problem... Hope this tutorial helps you scoop up every once of trash in your car too!

         There really was no tutorial out there that I saw of exactly what I wanted, so I just started to fly by the seat of my pants, and by golly it turned out :)

First you will need:
2 pieces of  matching fabric for the outer shell measuring 10"x14"
4 pieces of matching fabric for the inner shell measuring 9.5"x 13.5"
2 pieces of heavy duty double sided Inner Fuse measuring: 9"x13"
1 center release buckle (that's what I used and love, but any 'ol buckle you like will do)
2 pieces of material for the straps measuring 3.5"x11"

(Note: We have a big SUV, the sizes above are made to fit a larger car, you may want to scale it down if you have a smaller sized car)

                                      Here's the Inner Fuse I used.

Once all my pieces were cut, I sandwiched the Inner Fuse between two pieces of my inner shell fabric and ironed it like crazy. Iron both sides of the fabric.

Next, go grab the other piece of Inner Fuse and your other two pieces of
inner shell fabric and repeat the above steps.

Now you have two sets of stiff fabric! Hooray! Fold over the top lining to where it meets the Inner Fuse and sew at the top of the shell. Don't worry to much about what this will look like, the trash bag will be covering this, plus we will be turning this inside out later. Do that to both inner shells.
Once the tops of each of the shells are sewn up, you will then lay them on top of each other and sew the remaining 3 sides. Make your seam right against the inner fuse. Again, no worries about how this will look, we are flipping this inside out next!

Then you can flip it to hide the seams. Although, this Inner Fuse is heavy duty and makes it a little hard to do that. So just push it into itself slowly and then...Taa daa, its right side out! Done with the inner shell. It's nice and tough and holds it's shape fabulous. Making it nice to shove place trash in.


Then you will want to hem up the tops of the outer shell.

Next, lay them on top of each other, right side in,
and sew the remaining 3 sides up.
Trim the bottom corners, make sure you don't cut the seam!
Now fold it inside out, and set it aside for now.

Next, grab one of your strips of fabric you will be using
 for the straps and fold it over. Sew up the side and bottom.
Do this to both straps.
Then fold them right side out.


Then,  place each strap through a side of the buckle. The unsewn side
should be the one closest to the buckle.

Then, fold the unsewn end under, and hem.
Do that to both ends of the buckles. Should look like this when they are done.

 Next, you will want to take one side of the buckle and sew it to the side of the otter shell where the seam is.                          
                                          Do that to both sides

Now that your done with the otter shell, you can put the trash bag inside the inner shell. For the trash bag, I just used a walmart bag and cut off the handles.I always seem to have tons of those handy.

   Next, place the inner shell inside the outter one. It should  fit nice and snug.This will help  to hide the unsightly trash bag, and keep it in place.


Next, if you'd like you can take a needle and thread and run a few stiches through the bottoms of the bag, attaching the two shells. I just ran like 3 large stitches by hand through the center of the bottom. It helps keep both layers always attached, even though they should fit snug. But, if you do this beware-its painful!I'm just say'n, consider yourself warned! I don't know how many times I stabbed myself reaching in the bag to grab the needle as it came through. Not to mention tying a knot from insde the bag. Not easy folks! I swear this was the hardest part , but I am glad I attached them.  

Finally, test it out in your car!

OR
Now, the fun part....cleaning out the car!
Hope this tutorial helped. Thanks for visiting!


I am linked up here:
 UndertheTableandDreaming