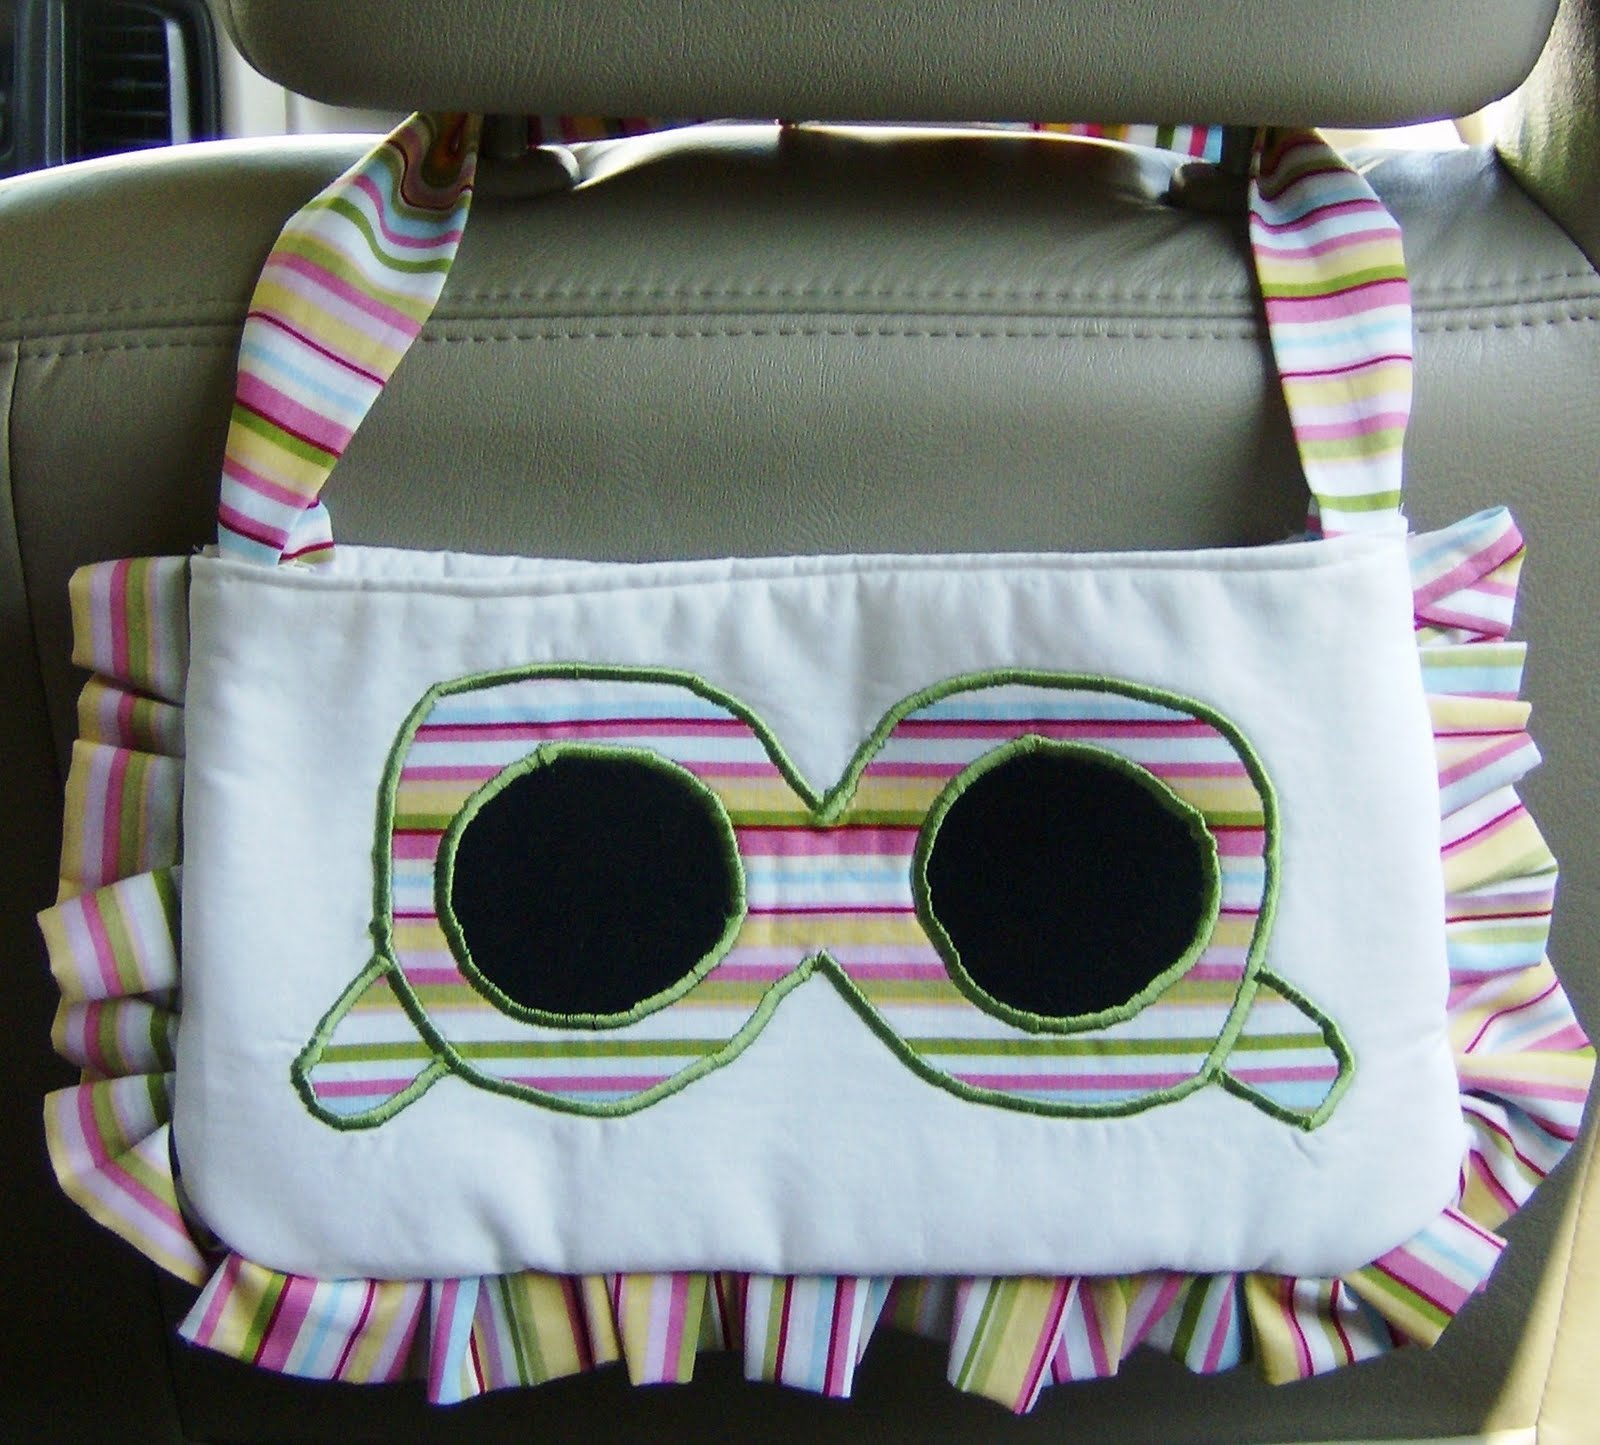
Hello ladies, this weekend I got a few hours to myself...what did I choose to do with it you might ask? Sew of course! I totally should have been doing laundry or cleaning, but really, that's not nearly as fun! So, I whipped up a car sunglass holder to help keep us more organized. Our kids LOVE sunglasses! We really did need something to stash our specs in. We use to keep all their little sunglasses stowed away in my car console, I always hated passing the glasses back to them while I should be driving. This helps so much, they love being able to get them when they need them and feel more independent. Plus, they think its cool to sit in front of this, so I just had to make something to put on the other seat. Anyway, here's the skinny on how I made it...
Materials
(4) 12 1/2 " x 8" of material for the bag
(2) 12 1/2" x 8" of fusible fleece to help give the bag some padding
(2) 12" x 5" of material for the straps
a few scraps of double stick fusible webbing for the sunglass and lens applique
Ruffle-mine was 3" wide. Then for the length, you want to measure the 3 sides of the bag and double it. (I only had a little material to work with so I had to do my ruffle in 3 sections) normally you just double the total length of all the sides.
2 small pieces of sewable velcro
thread
sunglass applique pattern, you can download here
(1/4 seam allowance used throughout)
First print off the sunglass applique (see the free printable download above) Print it on cardstock, cut out the sunglasses and lenes.
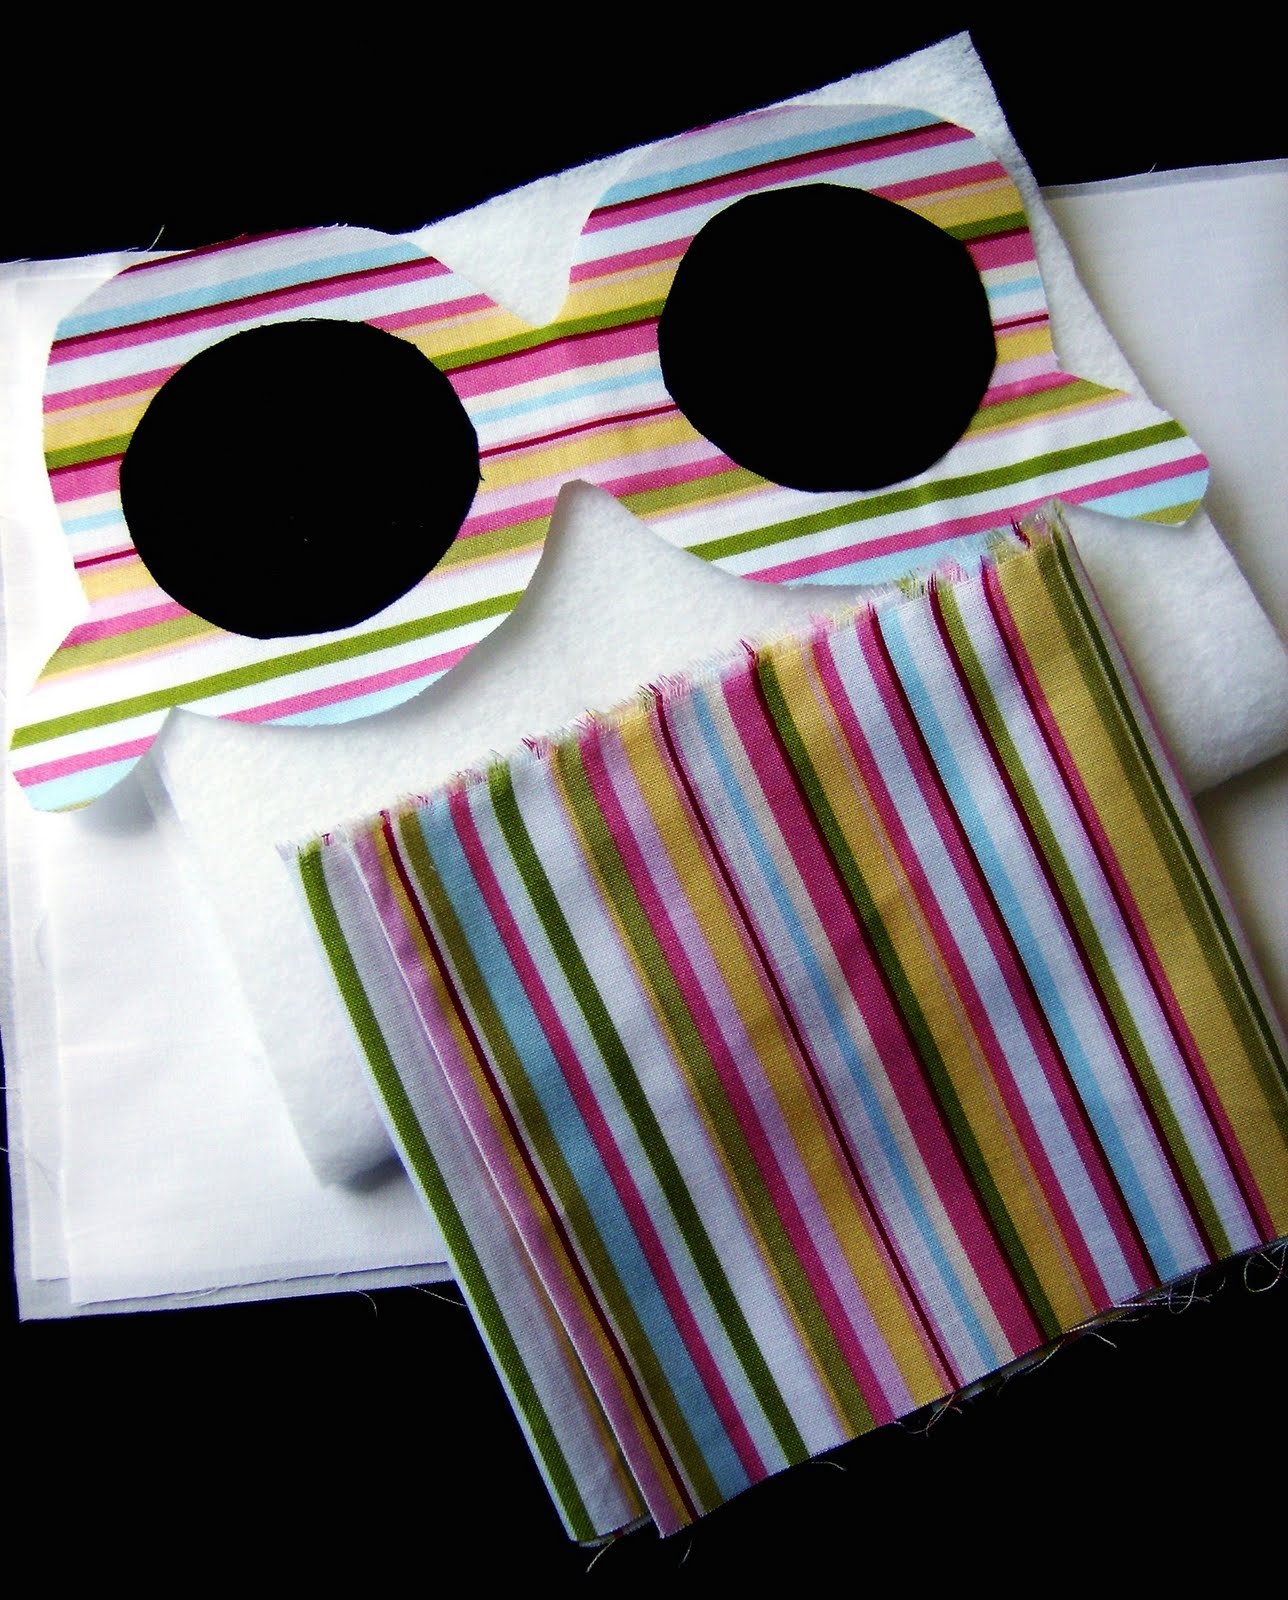

Next iron on a piece of your fusible fleece to the back of the your main fabric. This will help give it some padding. It will also act as a stabilize when you sew around the applique.

Grab your two remaining pieces of main fabric and sandwich the webbing between them and iron them together.
Now on to the ruffle. You will want to fold your material in half, right side facing out. Then go here and check out this tutorial on how to complete the ruffle. They show you how to make one by hand (which is what I did) or using the machine.
Once you've completed your ruffle, pin it to your fabric with the clean folded ends towards the sunglass applique. Then lay the backing on top and sew up the 3 sides of the fabric.

Remove the pins and flip it inside out. Whalaaa, almost done... Now,take the opening of the bag and fold the seam down a bit and sew the raw edges of the bag closed.


Next, tuck just a little of the raw edges of the end of the strap inside, and place the velcro on top. Sew the velcro on. This will also sew the raw edges closed. Do the same thing on the other strap. Keep in mind the placing of the velcro and how they two pieces will meet. For example: One of the peices of velcro should be attached on the front side and the other on the back side (seam side) of the material as the above picture.
Then take the other end of the strap, fold raw edges inside a bit and sew them to the sides of the bag. I choose to hand sew them so my footer would not accidentally sew over the ruffle.

Whoot Whoot all done! Now time to add the sunglasses for safe keeping.
Thanks for Visiting!
I hope all you ladies have a very Happy Mothers Day this weekend!!
I am linked up here:
Its Sew For You, Sugar Bee Crafts, Dot Dot Dot
Delightful Order Paisley Passions
Under the Table and Dreaming
Delightful Order Paisley Passions
Under the Table and Dreaming
awesome. you could even change the black fab into silver or mirrored...that woold be fun too (except on really sunny days, LOL).
ReplyDeletethis is sooo cute! Just saw it on last weeks DOTDOTDOT linky party...
ReplyDeleteGreat idea and so useful too! I need to make one of these!
My goodness - I love this! Super cute idea and perfect for my little shade wearing guy! Thanks so much for linking to the Sunday Showcase Party - I greatly appreciate it. I have featured this today. Hope the rest of your week is wonderful~ Stephanie Lynn
ReplyDeletewww.bystephanielynn.com
I am passing on to you the Versatile Blogger award.
ReplyDeletehttp://www.juiceboxdreams.com/2011/05/award-for-me.html
Congratulations and great work.
Kelly at juicebox Dreams